Pre-requisites
This article builds on top of the previous blog posts. You will need the followings:
- Azure subscription (with ~€10 budget. If you don’t delete the environment then the Storage Account and the Container Registry will generate some costs.)
- An on-premise PC, VM, Server to install Kubernetes
- Install Kubernetes. See Kubernetes deployment
- Connect your cluster with Arc. See Azure Arc with on-prem Kubernetes
Introduction
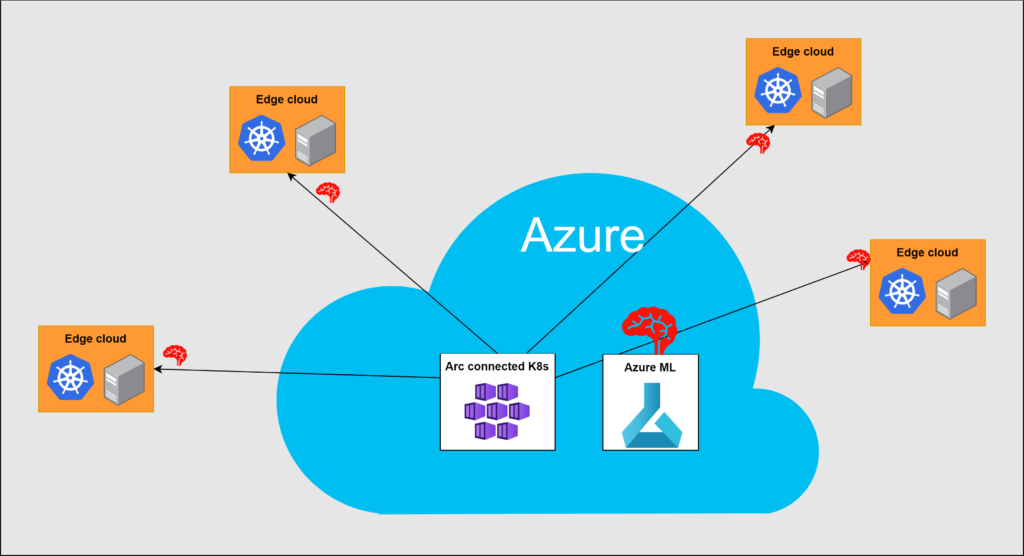
Creating and managing Artificial Intelligence models is a complex mechanism which involves several technologies. Azure Machine Learning (ML) is a workspace (or a framework) which brings together these technologies and drastically simplify their usage.
Azure Machine Learning in nutshell
In a later post, I will focus on how ML works but here I rather focus more on the infrastructure aspects.
Azure ML is a framework which includes several components which are needed for the whole AI/ML training and running process. These are the Storage Account, KeyVault, Container Registry and Compute Capacity. In the next steps we will create a very basic Azure ML workspace and we let Azure to automatically create most of the components. Then we will install the Azure ML extension to our Arc connected Kubernetes cluster and we attach it to the Azure ML workspace so we will be able to deploy ML models directly from Azure to our cluster.
Deployment
Variables
Similar to the previous blog posts, we will use variables to the commands. Feel free to change on the names. Nevertheless, I assume that you deploy into the same resource group and you use the same values as in the previous posts.
ResourceGroup="Arc-IoTrains"
ClusterName="iotrains-k8s"
ACRName="iotrainsacr"
AMLExtName="iotrains-ml"
ArcMLExtIdentityName="iotrains-arc-identity"
MLWorkspaceName="aml-iotrains"
Azure ML workspace
In a lab environment we can leave all sub-component creation to Azure. In a production environment we would independently create and harden the Storage Account, the KeyVault, the Container Registry, the User-assigned identities, Policies, etc. But this is far from a production environment so we can be lazy and use a single command.
As we already created a Container Registry we can attach it to our Azure ML workspace. We get its Resource ID and then we can start the deployment which will take several minutes.
ACRID=$(az acr show \
    --name $ACRName \
    --resource-group $ResourceGroup \
    --query id \
    --output tsv)

az ml workspace create \
  --resource-group $ResourceGroup \
  --name $MLWorkspaceName \
  --container-registry $ACRName
Once the deployment is ready then navigate to the Azure Portal and search our freshly created Azure ML workspace. It shall look like something like this.
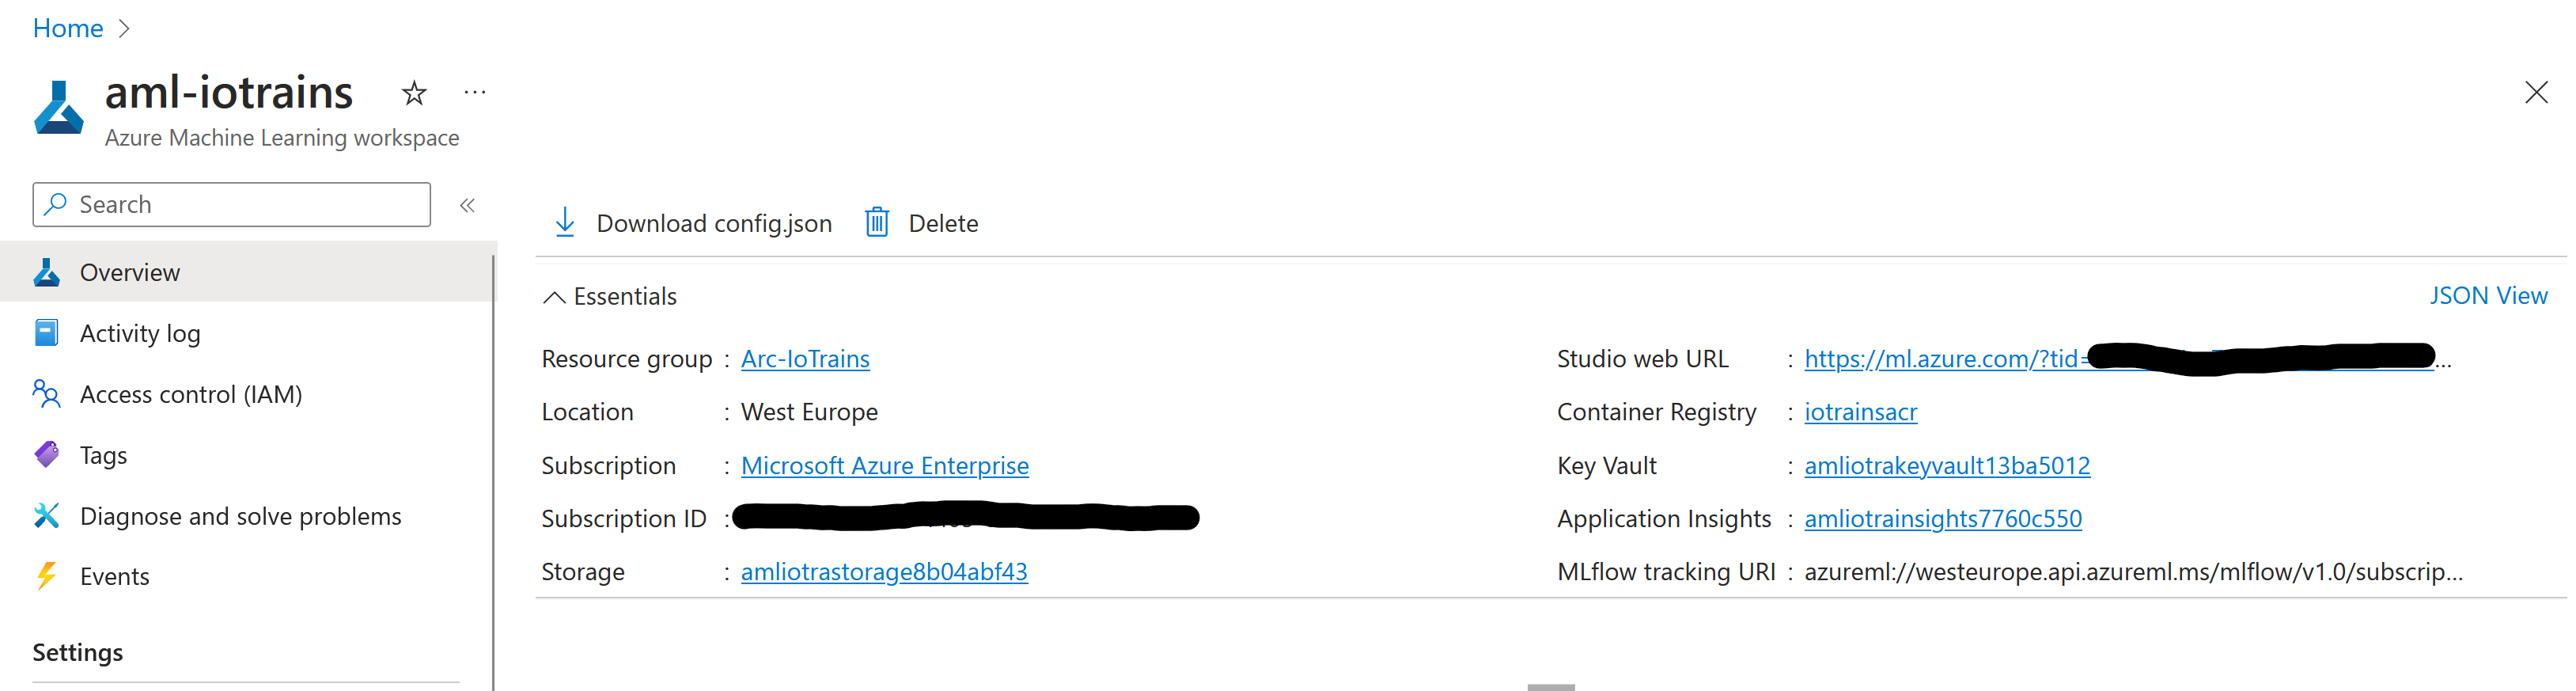
Click on the “Studio web URL” which opens our new workspace. Feel free to explore a bit but we will have a closer look in a later post.
Azure ML extension to the Kubernetes
We need to prepare our K8s cluster to connect to the Azure ML and of course there is an extension for it. Let’s deploy the extension to our cluster. It takes ~3-5 minutes.
az k8s-extension create \
  --name $AMLExtName \
  --cluster-name $ClusterName \
  --resource-group $ResourceGroup \
  --extension-type Microsoft.AzureML.Kubernetes \
  --config enableTraining=True \
           enableInference=True \
           inferenceRouterServiceType=LoadBalancer \
           allowInsecureConnections=True \
           inferenceLoadBalancerHA=False \
  --cluster-type connectedClusters  \
  --scope cluster
If you wish then you can follow the deployment on your K8s cluster with the following command.
watch kubectl get pods -n azuremlNow our cluster is ready and we need to attach it the Azure ML workspace. For that we need a User-Assigned Identity which will handle the permission control.
az identity create \
  --name $ArcMLExtIdentityName \
  --resource-group $ResourceGroup

AMLExtIdentityID=$(az identity show \
    --name  $ArcMLExtIdentityName \
    --resource-group $ResourceGroup \
    --query id \
    --output tsv)
The next step is get the Cluster’s Resource ID and do the attachment.
ArcK8sID=$(az connectedk8s show \
--name $ClusterName \
--resource-group $ResourceGroup \
--query id \
--output tsv)
az ml compute attach \
--resource-group $ResourceGroup \
--workspace-name $MLWorkspaceName \
--type Kubernetes \
--name amlarc-compute \
--resource-id $ArcK8sID \
--identity-type UserAssigned \
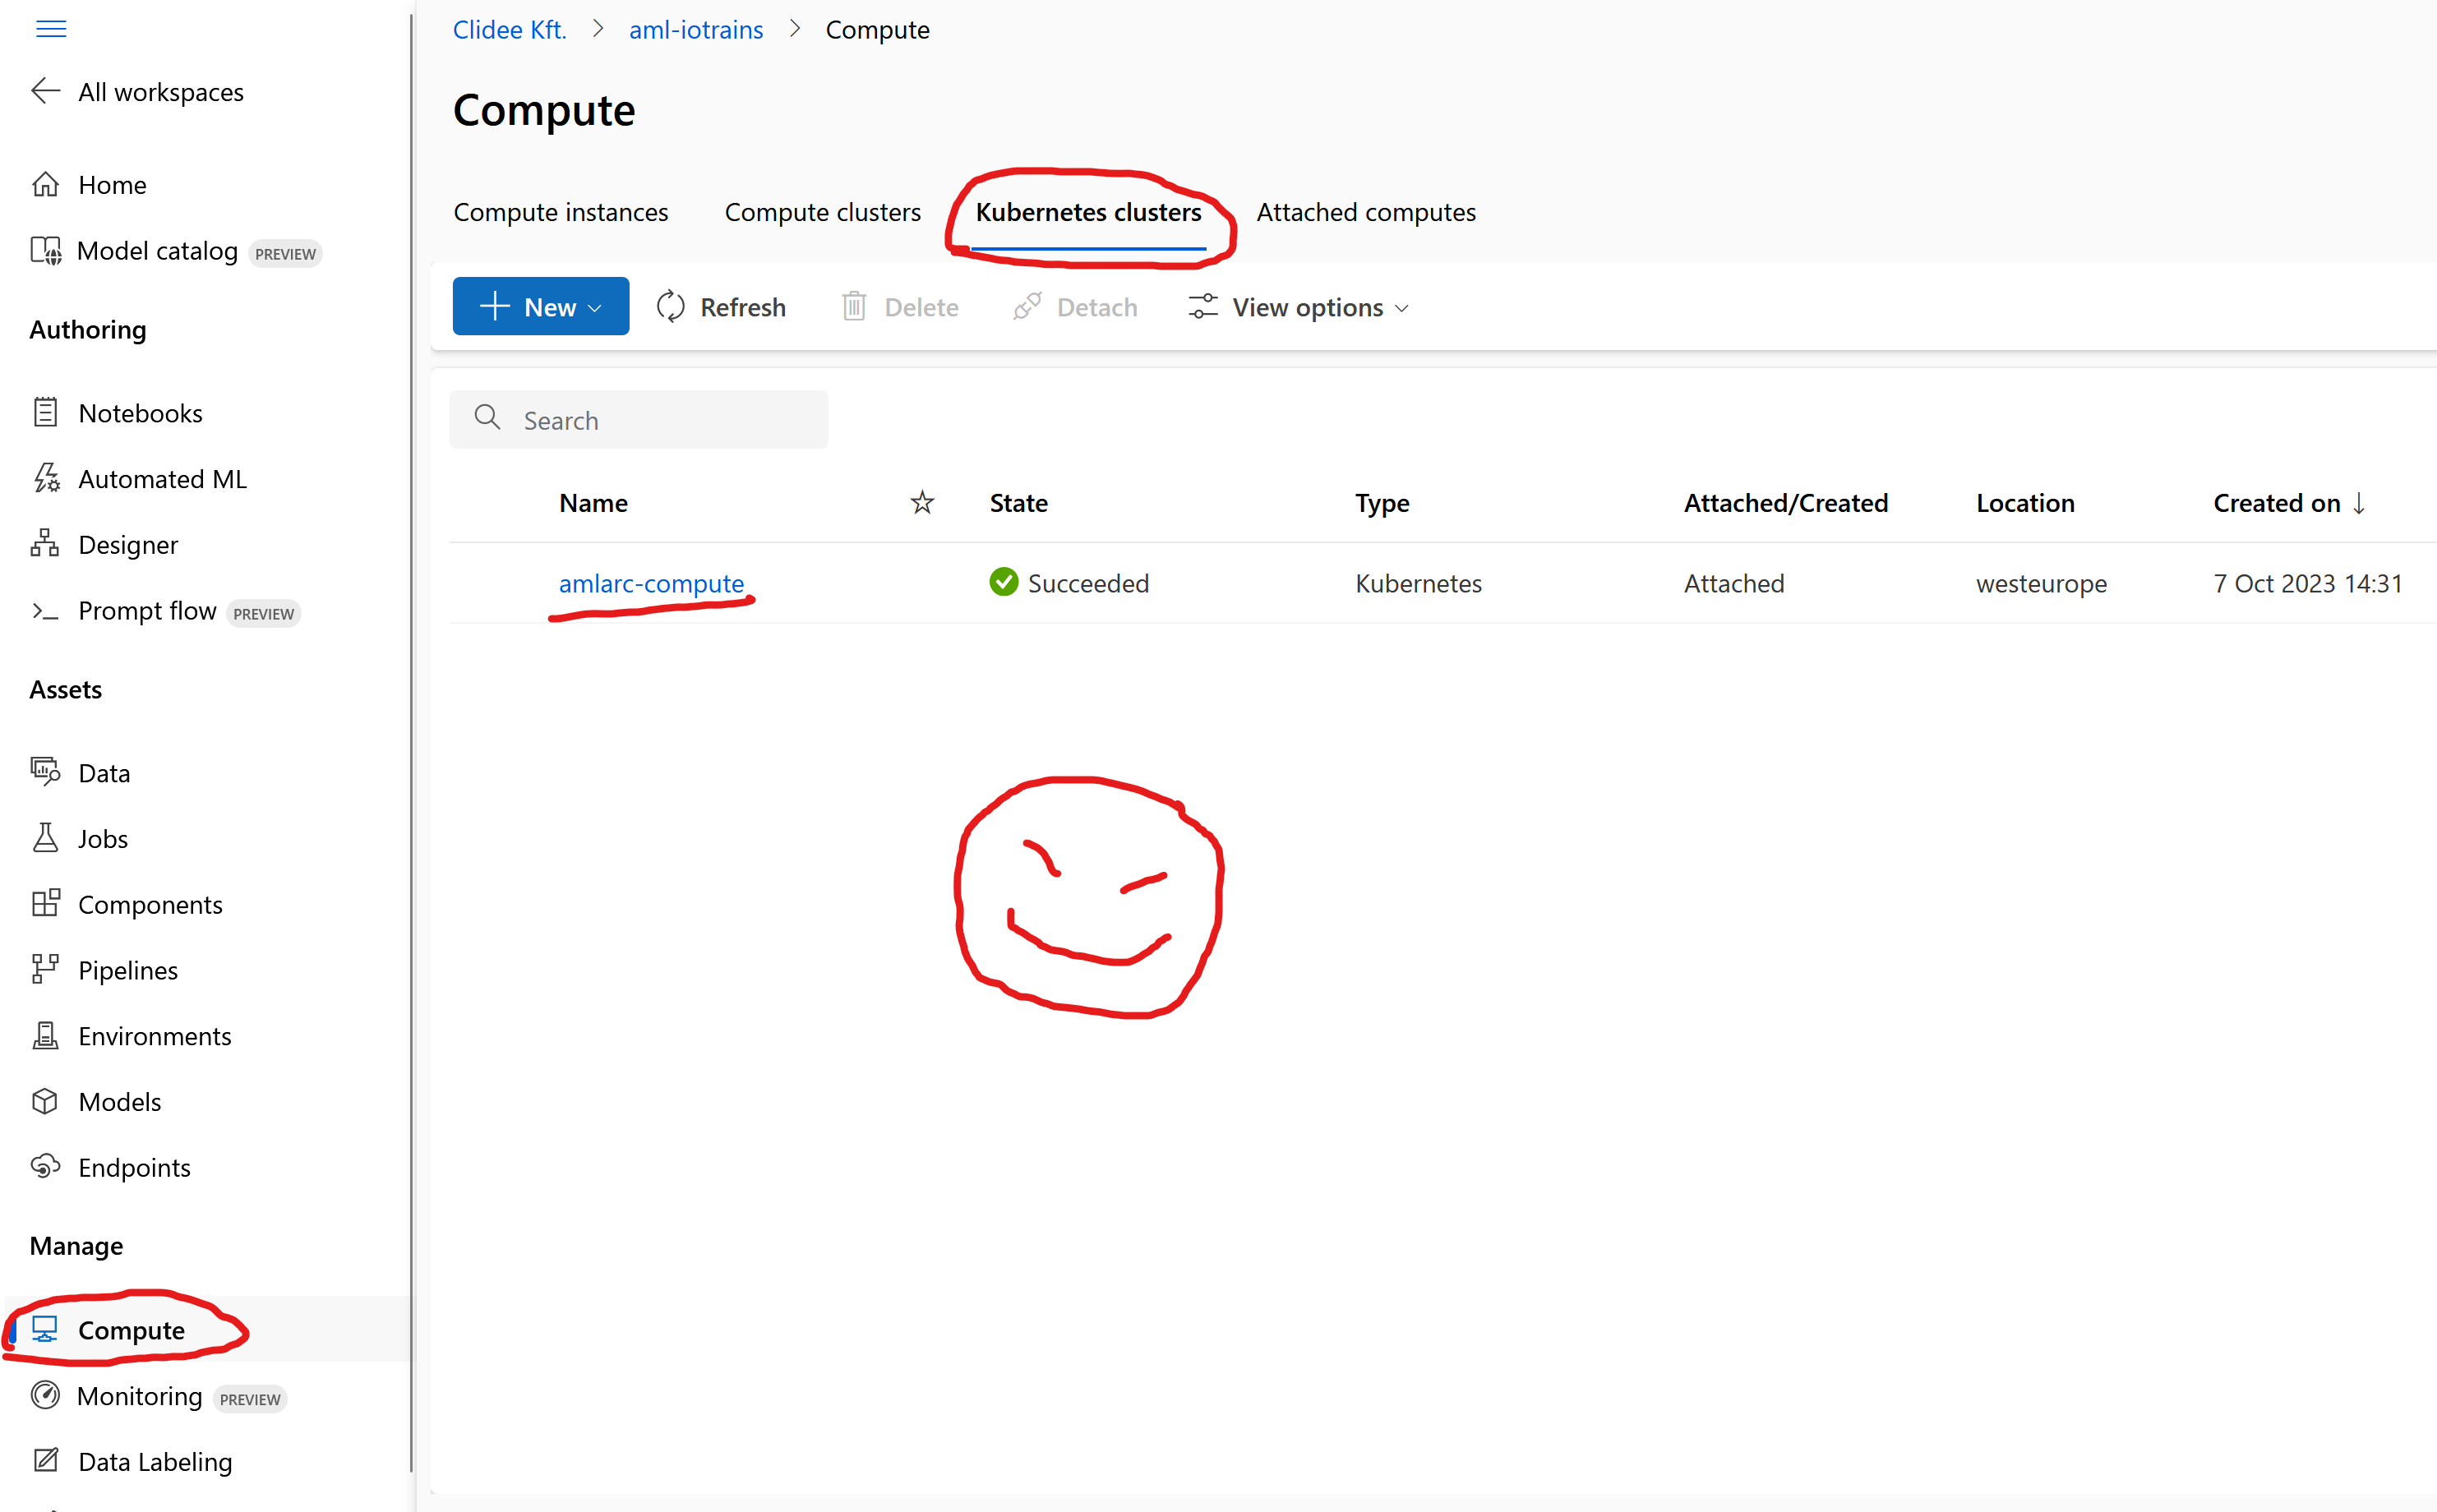
--user-assigned-identities $AMLExtIdentityIDOnce the attachment is ready then you can go back to the AI Studio. Select “Compute” in the left menu then select the “Kubernetes clusters” tab. You shall see your cluster there.
As a final step we need to create an “InstanceType” configuration on our cluster. When a cluster is attached to the Azure ML then only a defaultinstancetype is created which can be used for CPU based models but we want to deploy a GPU based model. This InstanceType will specify how much CPU, Memory and GPU are allocated to one deployment. In short this defines the compute resources to the model’s container.
The yaml file looks like this:
apiVersion: amlarc.azureml.com/v1alpha1
kind: InstanceType
metadata:
  name: cudainstancetype
spec:
  resources:
    limits:
      cpu: "8"
      nvidia.com/gpu: 1
      memory: "8Gi"
    requests:
      cpu: "500m"
      memory: "1000Mi"
You can easily deploy it with the following command:
kubectl apply -f https://raw.githubusercontent.com/szasza576/arc-iotrains/main/infra-setup/azure-ml-instancetype.yamlIf you wish to fine-tune the limits then you can download the file first, modify and apply the modified one. BTW, the 8Gi memory limit is just a limit. If you have less then it won’t cause issues.
Congratulation if you made it so far. The next step is to use our deployment. See you soon in the next post.
Source of cover picture: https://azure.microsoft.com/en-us/products/machine-learning